
Quickly and safely disassembling office cubicles Houston is one of the most important steps in the process of moving, renovating, or rearranging a workspace.
If done correctly, this will save both time and money, and will also prevent damage to parts and disruption in transportation.
Now you might want to know how to disassemble office cubicles in 30 minutes.
To disassemble office cubicles in 30 minutes, start by unplugging electrical components and removing accessories.
Detach work surfaces, then carefully disconnect panels by reversing the assembly order.
Use labeled storage to keep hardware organized.
Choose modular systems and modern collaborative office furniture for faster breakdown.
In this step-by-step guide, you’ll learn exactly how to easily and safely disassemble an office cubicle in under 30 minutes, even if you’ve never done it before.
This guide is designed specifically for standard and modern office cubicles and requires at least two people to open them.
Careful planning and preparation before starting work is the key to completing this process quickly and safely.
By following the tips in this guide, you can easily disassemble office cubicles and get them ready for moving or remodeling.
1. Preparation: Tools and Safety
To quickly and safely disassemble modern office cubicles, it is very important to have the right tools and follow safety precautions.
Having these tools and following safety tips will both speed up the work and minimize the risk of damage to people and equipment.
A. Essential Tools
To quickly and safely disassemble office cubicles, it is very important to have the right tools and follow safety precautions.
- Hand Tools: It is necessary to loosen all kinds of screws and cubicle joints.
Having several different sizes allows you to easily loosen any type of screw.
- Power Tools: Many office cubicle joints require a wrench.
An adjustable wrench is more flexible and suitable for screws of different sizes.
- Safety Equipment: It is used for soft, controlled blows to separate parts without damaging them.
This hammer helps you loosen tight joints with gentle blows.
- Utility knife or box cutter: It is used to cut plastic fasteners, ropes, or cables, and helps to open the cubicle faster.
- Power Tools: Using a cordless drill greatly speeds up the work of unscrewing screws and reduces the time spent disassembling each cubicle.
- Safety Equipment: It is essential to protect hands from cuts, bumps, and scrapes.
Gloves also help you grip tools more comfortably and with better control while working.
It is very important to protect your eyes from dust, small wood chips, or metal that may be thrown when removing panels.
B. Accessories
- Use ziplock bags or small containers to store screws, nuts, and small parts to prevent them from getting lost.
- Labeling to number parts and screws so that each part can be easily found when reassembling.
- A handcart or trolley for moving panels and large parts safely and easily.
- Special covers to protect parts from scratches and impacts during transportation or storage.
You Might Also Enjoy: How to Assemble Office Cubicles in 30 Minutes?
2. Key Safety Precautions
- Assess the Environment: Before you start, carefully inspect the area and look for power, network, or telephone cables.
Knowing exactly where the cables pass helps prevent sudden power outages or damage to communication equipment when disassembling office cubicles.
- Power Disconnection: If the cubicles have electrical outlets or integrated electrical systems, be sure to disconnect power to the area before opening to avoid the risk of electrocution.
- Teamwork: Always work with at least one other person, especially when moving large or heavy panels.
Working together increases safety and reduces the risk of injury.
- Proper Lifting Techniques: Use your legs to lift heavy items, not your back.
Bending at the waist to lift can put pressure on your spine and cause serious injury.
- Beware of Sharp Edges: Some cubicle parts and fittings may have sharp edges or corners.
Be careful when removing and moving, and do not expose your hands or body to danger.
- Clear Workspace: Provide enough space to move and place the opened parts.
A cluttered environment increases the possibility of falling or damaging parts.

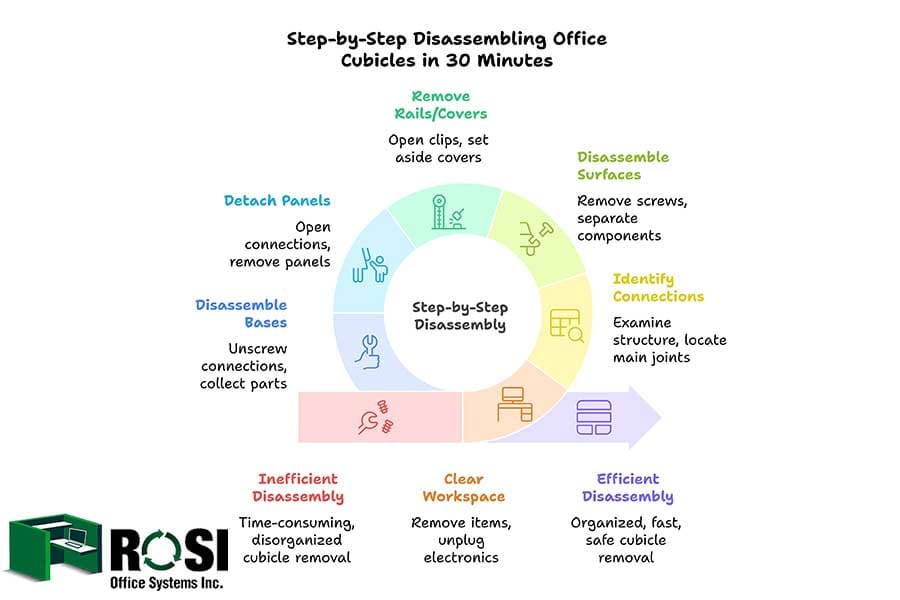
3. Step-by-Step Disassembling Office Cubicles in 30 Minutes
In order for the private office cubicle disassembling process to be completed in 30 minutes, each step must be performed in an organized, fast, and safe manner.
In this section, we have explained the steps in order, along with the approximate time for each.
A. Clear the Workspace (1-2 minutes)
Before you start disassembling the office cubicle, you must first prepare the surrounding space.
All items inside tables, drawers, and shelves should be removed so that they are not disturbed or damaged when removing parts.
Also, unplug and put away all electronic equipment such as monitors, power, network, or telephone cables.
Personal belongings, decorations, and fragile objects should also be removed from the environment.
The goal of this step is to create a safe, clear space to begin work without additional obstacles.
B. Identify Connection Types and Weak Points (2-3 minutes)
At this point, you should carefully examine the cubicle structure and identify the location of the main connections.
Most office cubicles have a modular design, meaning their components are connected via screws, clips, hooks, or locking mechanisms.
By looking closely at the edges and where the panels and bases intersect, you can identify the type of joints.
Focusing on these points will help you complete the disassembling task without trial and error.
C. Disassemble Work Surfaces and Drawers (5-7 minutes)
Work surfaces such as desks, drawers, and side shelves are usually attached to the main cubicle frame with screws.
Use a screwdriver or cordless drill to remove the fasteners, then gently separate the connected components.
It’s best to put the screws and small parts of each section in separate ziplock bags and label them so you don’t get confused when reassembling.
This step must be done carefully to avoid damage to the equipment.
D. Remove Top/Bottom Rails and Covers (5-7 minutes)
Many cubicles have plastic or metal covers at the top and bottom that are used to hide cables.
These covers are usually attached to the panels with clips or small screws.
Carefully open them and set them aside.
If removable decorative or acoustic panels are also installed on the structure, you can remove them at this stage.
This section helps to better access the main structure.

E. Detach Main Vertical Panels (8-10 minutes)
This step is the most important and time-consuming part of the process.
In interconnected cubicles, the panels are usually connected to each other with screws or clips.
Identify these connections and open them using the appropriate tool.
On standing models, the legs or stabilizers under the panel must be opened.
In this section, the cooperation of two people is essential to prevent damage to the panels or danger to people.
F. Disassemble Bases and Vertical Posts (2-3 minutes)
After opening the joints, carefully separate the panels and immediately move them to the area where you intend to pack or transport them.
After all the panels are removed, the uprights and vertical posts of the frame are usually left.
These components are also attached to the floor or body with screws or locks.
Carefully unscrew these connections and collect the parts.
Make sure that no parts, including screws, fasteners, or brackets, are left in place.
Place all small components in labeled bags so they are ready for reinstallation.
You Might Also Enjoy: Who Sells Top-Rated Modular Office Cubicles? 2026 Guide
4. Tips for Maximum Speed and Efficiency
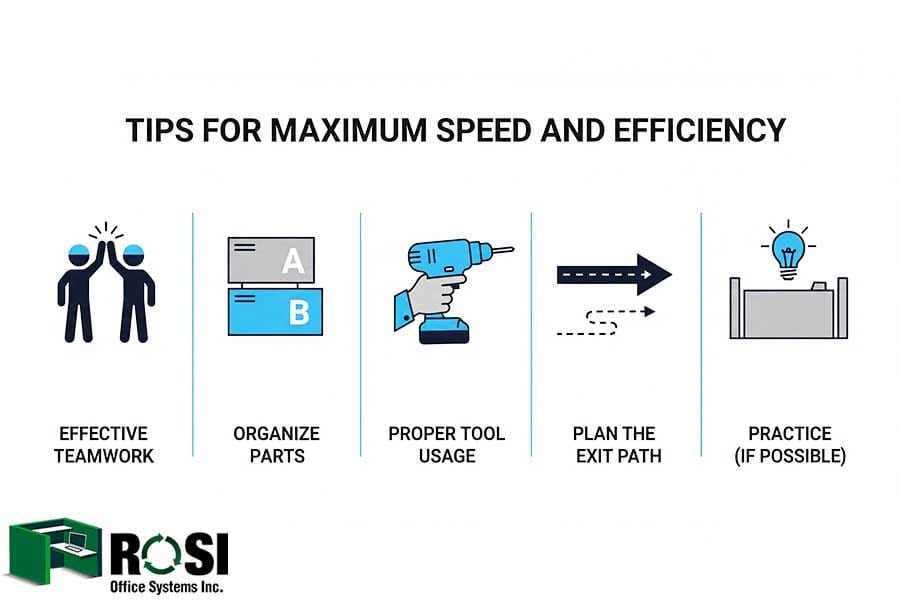
A. Effective Teamwork
To ensure that office cubicle disassembling is done quickly and without mistakes, it is very important to divide tasks among team members.
For example, one person could be responsible for loosening screws, and another person could hold or remove panels.
This division of roles saves time and reduces errors.
Also, constant and clear communication between members during the work process prevents mistakes or accidents.
B. Organize Parts
One of the main keys to getting the job done quickly is being organized while unpacking.
Use a labeling system.
Place screws, clips, and small parts in ziplock bags or separate containers.
Also, group similar parts in one place to avoid confusion during reassembly.
C. Proper Tool Usage
Using tools correctly speeds up work and prevents damage to parts.
Use a cordless drill to prevent the screws from breaking.
Also, for each type of screw, use the appropriate screwdriver or drill series to avoid slipping or damaging the threads.
D. Plan the Exit Path
Before you start disassembling office cubicles, check and determine the exit route for panels and large parts.
The path should be open and free of obstacles so that people do not collide or stop while carrying parts.
Properly planning the exit route prevents wasted time and potential dangers.
E. Practice (If Possible)
If you have a lot of cubicles to disassemble, it’s best to consider the first cubicle as an initial practice.
This will familiarize you with the connection structure, the tools required, and the proper disassembly sequence.
After this practice, the next steps will be performed much faster and with greater accuracy.
5. Post-Disassembly
A. Packing and Transport
After the parts are completely disassembled, the next step is to package them safely for shipping.
Large panels and other sensitive components should be covered with protective covers or special pads to prevent scratches, impacts, or breakage.
When loading parts into the vehicle, make sure that all components are properly and securely placed and that there is no possibility of them moving or bumping along the way.
Using restraint straps or shock absorbers can increase load safety.
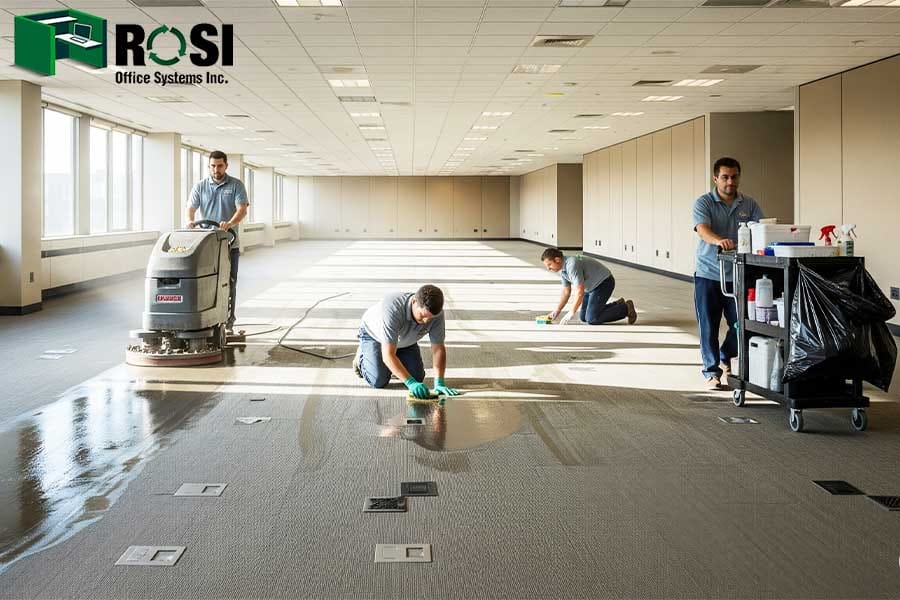
B. Clean Up the Area
After disassembling office cubicles is complete, thoroughly inspect the work area and collect any scraps, left screws, or scattered tools.
Maintaining a clean and tidy environment not only shows professionalism but also prevents potential hazards.
Also, if the place is owned by another person or company, its cleanliness becomes even more important.
C. Final Check
Before leaving, do a final check to make sure no tools, parts, or packages are left behind.
Checking corners, under tables, and behind panels can prevent equipment from being lost or forgotten.
This simple step saves time and money and demonstrates the accuracy and professionalism of the executive team.
Conclusion
Disassembling office cubicles in 30 minutes becomes a simple and manageable task with proper planning, the right tools, and teamwork.
Throughout this guide, you learned how to complete the process quickly and safely by following specific steps, from preparing the environment and tools to step-by-step disassembly of components.
If you follow the steps carefully, label the parts, and work as a team, you can easily complete this task in less than 30 minutes.
If this is your first time disassembling an office cubicle, don’t worry; by following these steps, you’ll be able to do it easily.
Just proceed carefully, use the tips mentioned, and be sure that you can do this completely and safely in the allotted time.

John Ofield is a recognized expert in the office furniture and office cubicle industry in Houston, TX, with over 40 years of experience. As the founder of ROSI Office Systems, he specializes in furniture space planning, custom cubicle designs, modern office chairs and tables, and high-quality commercial furniture. John’s expertise helps businesses enhance productivity and collaboration. He is also dedicated to mentoring entrepreneurs and redefining workspaces to inspire success.